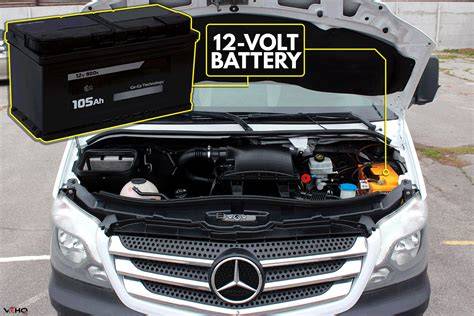
Understanding the Mercedes Sprinter battery location saves time and prevents mistakes during maintenance or replacement. On most Sprinter models, the main starter battery sits beneath the driver's seat rather than under the hood. The main battery is located under the driver’s side floorboard, with some models having a secondary plastic cover or hold-down bracket over the battery itself. This design protects the battery from weather and road spray, but it can make access less straightforward than in typical vehicles.
Rozdělení podle generací a obecná logika
NCV3 (2007-2018): Access panel is usually held by a few Torx screws and lifts out as one piece. VS30 / 907 (2019+): Very similar layout, but trim and plastic covers can be slightly different. The battery location is designed for protection, not convenience. Most modern vans use AGM batteries, which are sealed but still require a vent path. Some owners upgrade to lithium (LiFePO4) for house batteries, but starter batteries are almost always AGM.
Many vans include an auxiliary battery, especially for extended travel use. We often work with auxiliary battery setups when supporting off-grid travel needs in Sprinter and Transit family van conversions. For camper builds, reserve capacity (RC) and amp-hour (Ah) ratings are important for auxiliary or house batteries. Battery size varies by model year and factory equipment. Always confirm with your model year before replacing.
Praktické detaily a postupy
Sprinter vans provide jump-start terminals under the hood, instead of direct access to the main battery. Always follow the owner’s manual for exact locations and connection order. Before touching any cables, switch off the ignition and remove the key. Turn off all electronics, including lights, fans, inverters, and aftermarket accessories. Remove the floor panel using the correct Torx driver. Disconnect the negative terminal first, then the positive terminal. Lift the battery carefully straight up and out. After disconnecting the battery cables and removing the retaining bracket, lift out the old battery and place the replacement battery into the tray. Reconnect the positive terminal first, followed by the negative terminal. Take your time here. After installation, start the van and let it idle for a few minutes.
For more power-hungry rigs (induction cooktops, large inverters, electric heaters), multiple batteries and solar input make sense. This ties into one of our core principles: having the right tools prevents damage to panels and connectors, and choosing the correct battery is as important as installing it properly. Always disconnect the negative first. When reconnecting, reverse the order: positive first, negative last. Use a memory saver if you want to preserve settings. Ensure the vent tube is properly connected. Even though AGM batteries are sealed, the vent path is there for a reason.
Praktické tipy pro výběr a sestavení
OEM batteries match factory specifications and are reliable for most users. They’re designed to work with the Sprinter’s charging profile, start-stop logic (if equipped), and electrical load. Some owners upgrade to lithium for house banks, but the starter battery is almost always left as AGM. For extended travel, a secondary battery setup adds flexibility without affecting the starter system. Many van lifers pair a robust AGM or lithium house bank with solar and a DC-DC charger, leaving the factory starter battery to do what it does best-start the engine every time.
Yes, in some cases, advanced systems may require recalibration after a short drive, and care is required due to the location and electrical connections. Typically 30 to 60 minutes, depending on experience and tools. First-time DIYers should plan for closer to an hour so there’s no pressure to rush, especially around the confined Sprinter battery compartment under the driver’s floor and when locating the exact Sprinter battery placement for your specific rig during a Mercedes Sprinter battery replacement or general starter battery change.
Často kladené otázky
- Kde je hlavní baterie Sprinteru umístěna?
- Jsou AGM nebo LiFePO4 vhodné pro startovací baterii?
- Potřebuji kalibraci po výměně baterie?
- Jaký vliv má sekundární baterie na startovací systém?
Rychlá souhrnná doporučení
- Hlavní startovací baterie je obvykle umístěna pod pravou stranou podlahy řidiče.
- Postup výměny baterie je standardní: odpojit záporný kabel, poté kladný, vyjmout, nainstalovat novou a připojit nejprve kladný, pak záporný.
- Pro náročné výbavy s off-grid řešení je doporučeno doplnit sekundární baterii pro house power, solární systém a DC-DC nabíječku.
- Vždy sledujte návod výrobce a použijte správné Torx nářadí pro přístup a upevnění.
Pro doplnění informací a lepší pochopení mohou být užitečné vizuální materiály a videa, která ukazují konkrétní postupy pro jednotlivé modely a roky výroby.